Abstract
With an increasing number of dental practitioners using composite resins as the restorative material of choice, knowledge of terminology, handling properties and restorative techniques are important.
From Volume 38, Issue 8, October 2011 | Pages 549-556
With an increasing number of dental practitioners using composite resins as the restorative material of choice, knowledge of terminology, handling properties and restorative techniques are important.

In a world where success is linked to aesthetics, there is a growing demand from our patients for ‘white’ restorations.
Continuing education programmes in aesthetic dentistry are in demand as dental practitioners recognize that, in order to achieve optimum aesthetics and long-lasting restorations, they must have a thorough knowledge of the materials' properties and develop new clinical skills.
Dental manufacturers regularly introduce new materials requiring new techniques and applications, such as self-etch adhesives, self-etch resin cements and self-etching composites. Practitioners may find it difficult to stay up-to-date with these new materials and their terminology and, as a result, have difficulties in achieving the best results from the material for their patients. Meanwhile, recent graduates are more competent in using composite resin materials for the restoration of posterior teeth.1
This article addresses some of the questions asked by participants at continuing education courses presented by the authors using a question and answer format.
A. ‘Wet bonding’ is a technique used to enhance the bond strength of a total-etch adhesive system to dentine. By ‘wet bonding’, the etched dentine surface is kept moist to prevent the exposed collagen fibres from collapsing so that adhesive monomers can easily infiltrate the network within the demineralized dentine, forming a well defined ‘hybrid layer’ and enhancing bond strength. Fourth generation adhesive systems are more forgiving products and require fewer precautions regarding the wetting degree compared to self-etching adhesives. If the tooth is over-dried, the primer in the fourth generation systems can re-wet it.2,3
A. The ideal dentine surface for bonding with a total-etch adhesive system should be a moist glistening surface with no visible pooling of water. This can be achieved by a technique called ‘blot drying’. Rinse the etchant from the tooth surface, then saturate a cotton pellet with water and remove any excess water from the pellet by blotting it on a gauze pad. Use the pellet to moisten the tooth surface.
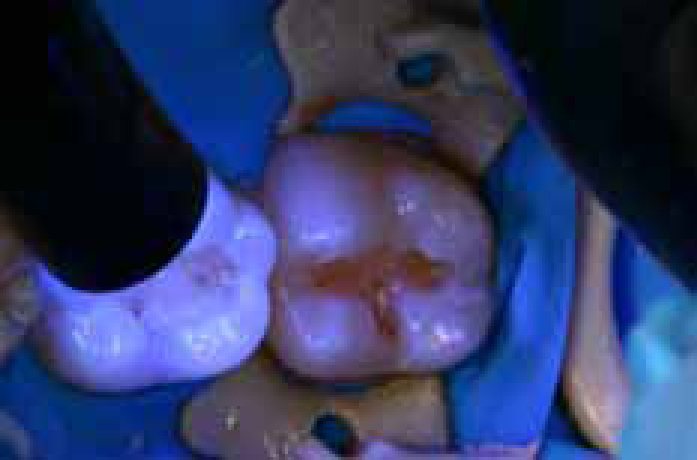
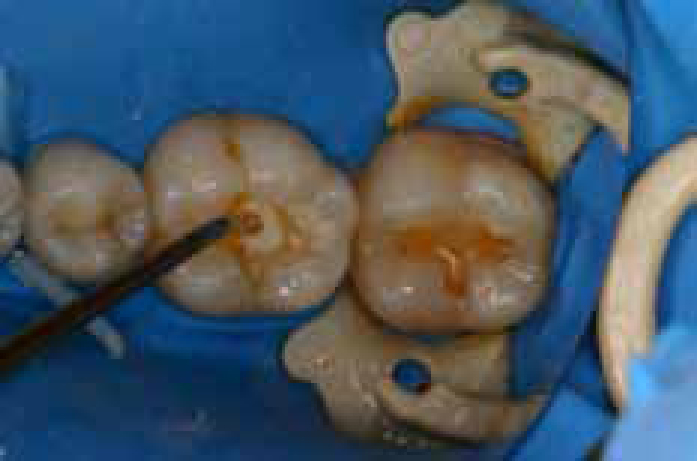
Other techniques for obtaining a moist dentine surface include applying a brief burst of air (2–3 seconds) with an air syringe after rinsing the etchant. If using this technique, ensure that the air syringe is free from any oil traces or, alternatively, apply a surgical suction tip on to the cavity for 2 seconds to remove excess water (Figure 1).

Wet bonding is not applicable to self-etch adhesive systems.4
A. Tooth conditioner is a name used for the etchant and was coined in an era when dentists were worried about using phosphoric acid on dentine. The most common etchant is a 37% aqueous solution of phosphoric acid. The function of an etchant is to create a clean rough surface for bonding, removing the smear layer and demineralized dentine/enamel so that a primer can effectively hybridize the dentine/enamel (to form a ‘hybrid layer’) and penetrate collagen fibrils and dentinal tubules (forming resin tags), resulting in enhanced bond strength.
Tooth primers are surface bifunctional active compounds, which promote adhesion to the hydrophilic dentine and the hydrophobic monomers. They can be considered as coupling agents to link the hydrophilic dentine surface to hydrophobic bonding resin/composite resins. They often contain HEMA (hydroxyethylmethacrylate) and acidic monomers.
Bonding resins are generally a blend of methacrylate monomers, to provide better curing and support for the primer so that it can more effectively seal the opened dentinal tubules and therefore resist the shrinkage of composite resin.
In the more recent adhesive systems, one or more of the above may be combined in the same bottle.
A. It is safe to etch superficial and deep dentine. It has been shown by many studies that that the etchant itself does not damage the pulp or lead to pulp inflammation. However, this technique is based on a complete seal of the previously etched dentine. It is imperative that, following the etching of dentine and the removal of the smear layer, a primer and/or an adhesive is applied on top to seal the open tubules and hybridize the demineralized dentine.
A powerful light-curing device must be used to ensure complete polymerization of the resin and thus avoid leakage towards the pulp (Figure 2). Microleakage causes pulpal inflammation and post-operative sensitivity.5,6,7
A. These are relatively new bonding systems, often referred to as self-etch adhesives, where the etchant, the primer and the bonding agent are incorporated into the same solution and are applied at the same time or together. The products may be presented all in a single bottle, or separately in two bottles, and mixed prior to their application (Table 1).
| Adhesive System | Steps | Generation | Smear Layer Removal | Examples |
|---|---|---|---|---|
| Etch and Rinse or Total Etch | 3 | 4th | Complete | OptiBond FL (Kerr) |
| 2 | 5th | Optibond Solo (Kerr) |
||
| Self-etch | 2 | 6th | Partial | ClearFil SE Bond (Kuraray) |
| 7th | Adper Prompt-LPop (3M ESPE) |
|||
| 1 | 8th | Partial | Optibond All-in-one (Kerr) |
The suggested advantage of these products is that the adhesive will penetrate and demineralize to the same depth as the etching, resulting in a fully supported hybrid layer. Further, the dentinal tubules are never left fully opened, so there is less chance of microleakage and post-operative sensitivity. This bonding technique tends to be less technique sensitive, as the challenging steps of etching, washing and drying are eliminated.8
A. A number of the currently available systems should not be used with chemically or dual cured composites. The acidity of the etching/bonding component will inhibit the amine effect and thus the polymerization of the chemically cured composite.
Further, the adhesive should only be applied to one cavity followed by the restoration, rather than applying it to a number of cavities at one time. This is based on the fact that this category of adhesive contains very hydrophilic monomers, and may attract water up the tubules which could compromise the polymerization of the resin.9
A. The 3-step (etching-priming-bonding) system or 4th generation (2 Step) adhesive system are still the gold standards, demonstrating the best clinical performance and the highest bond strength to enamel and dentine.3,10,11,12
Therefore, etch and bond should be used when retention of the restoration is poor. Self-etch should be used when retention is not an issue.
A. These are resin restoratives which have been manufactured using a percentage of extremely small particles. At this stage there is no evidence that they have any advantages over the traditional hybrid type resins. Recent studies have shown that nanocomposites have superior retention of the polished surfaces compared to microhybrid composite systems.13,14,15
A. No, the modern hybrid composite resins are suitable for all types of basic restorations.
A. Modern kits of composites contain different levels of opacity; opaque or dentine, body or enamel, and translucent or incisal. The purchase of two opaque shades (eg OA2, OA3.5), four body shades (eg A1, A2, A3, A3,5) and a translucent shade should be adequate for the majority of clinical cases. (Tables 2 and 3).
| Composite | Company | # Shades | Detail |
|---|---|---|---|
| Amelogen | Ultradent | 19 | |
| Charisma | Heraeus Kulzer | 16 | |
| Solitaire II | Heraeus Kulzer | 10 | |
| Filtek Z-250 | 3M ESPE | 15 | |
| Esthet-X | Dentsply | 31 | 3 Opacities |
| Filtek-Supreme XT | 3M ESPE | 30 | 4 Opacities |
| Gradia | GC | 22 | 3 Opacities |
| Point-4 | KerrHawe | 30 | 4 Opacities |
| Premise | KerrHawe | 32 | 3 Opacities |
| Vitalessence | Ultradent | 33 | 3 Opacities |
| Point-4 (Kerr) | Premise (Kerr) | Filtek-Suprem XT (3M ESPE) | Gradia (GC) |
|---|---|---|---|
| Opaque = 8 | Dentine = 8 | Dentine = 10 | Opaque = 3 |
| Body = 16 | Enamel = 18 | Body = 14 | Body = 13 |
| Translucent = 3 | Translucent = 4 | Enamel = 7 | Translucent = 6 |
| Extra-Light = 3 | Translucent = 4 |
Note that for elderly patients you may need dark shades and for bleached teeth, very white opaque resins.
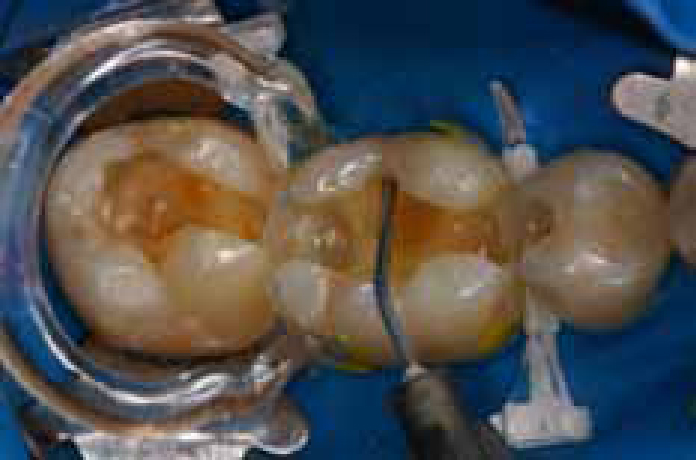
A. No, there are different viscosities of flowable composites. The same manufacturer can produce different flowable composites with differing percentage of fillers and thus be suitable for different clinical situations. Ideally, a flowable composite for use in a cavity should be easy to apply to the cavity wall and should not flow beyond the margins (Figure 3)16,17
A. It is more difficult for a packable composite to wet the adhesive surface, often resulting in voids or imperfections at the adhesive-composite interface. Although evidence is not clear yet, it has been shown that a flowable composite can improve the wetting between a stiff composite and the adhesive. It is also speculated that using a flowable composite first may also minimize the damage that a stiff composite, especially the packable composite, may inflict on poorly cured adhesive. The adaptation of the first layer of composite may be improved if a flowable is used and may enhance the bond strength and ensure a void free interface. Polymerization shrinkage strain can range from 1.7 to 3.1% in modern packable composite resins and from 3.5 to 6.3% in flowable composites. If a flowable composite is used, it should be remembered that it has a lower modulus of elasticity and that it should be applied in a very thin layer to avoid the effects of its excessive polymerization shrinkage.13,18,19,20
A. No, it is not mandatory to store resins in the fridge, provided ambient temperatures are not extreme. It is critical that resins are not used beyond their shelf life marked on the box. Old materials are very useful for constructing mock-ups and temporaries for anterior or posterior restorations.
The temperature of the material will affect its viscosity, thus in a cold state the material will be stiffer.
Some bonding systems require refrigeration owing to their more acidic nature and solvent volatility.
A. Compomers have excellent aesthetics in Class V restorations and, in theory, may release some fluoride. The amount of fluoride released by a compomer is usually about 1/10 of that released from a conventional glass ionomer or a resin-modified glass ionomer system.
There would appear to be no advantage in using a compomer over a composite resin.
A. Composite resins are the best materials we have to ‘seal’ a cavity. This is based on bonding to both enamel and dentine. The presence of a lining compromises this bond. If a lining is to be used, it should only be used if there is a direct or indirect pulp exposure. Calcium hydroxide should then be placed over the exposure and, because of its poor initial mechanical properties, protected by covering it with a small amount of glass ionomer or flowable resin.5,21,22,23 MTA (Mineral Trioxide Aggregate), and Biodentine (bioactive cement) from Septodont, can also be used for direct pulp capping.
A. A metal or celluloid matrix is suitable. Choice is based on gaining a close fit in the cervical area, gaining access through the contact point and achieving a good interproximal contact. Ideally, a sectional matrix is used if the proximal size of the cavity is not too wide and the matrix is supported buccally and lingually. A metallic separator or ring is added to enhance the contact point and compensate the matrix thickness.
Otherwise, a circular Tofflemire matrix system can be used (Figure 4)24,25,26
A. Some studies have demonstrated that there is no difference in clinical performance between celluloid matrix/reflective wedge technique and metal matrix/wooden wedge technique. Reflective wedges were introduced when we thought composite cured towards the light; this is not so.
Pre-wedging during preparation with a wooden wedge will help to achieve a tight interproximal contact. Pre-wedging is useful when there is a very tight contact which might not allow the operator to insert a matrix band.25,26,27
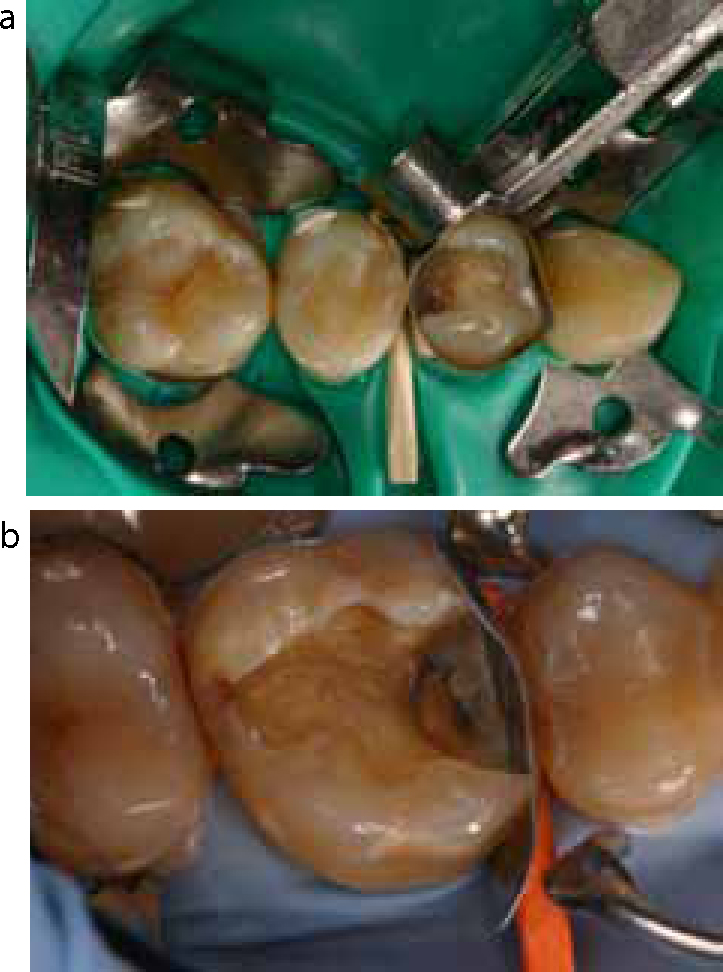
A. It is crucial to fill the cavity in small increments and to cure each layer completely. There are many techniques for incremental filling of the cavity, but the sequence is important. (a) Fill the cervical 1mm first and cure. Use a longer curing time than recommended as light is attenuated when we cure from the top. (b) Next fill one side of the box (buccal or lingual) and cure. Initially, do not link the two walls of the cavity with composite resin (Figure 5). (c) Finally, fill and cure the other side of the box. This technique will allow the composite to cure initially towards the wall and minimize internal stresses within the box.
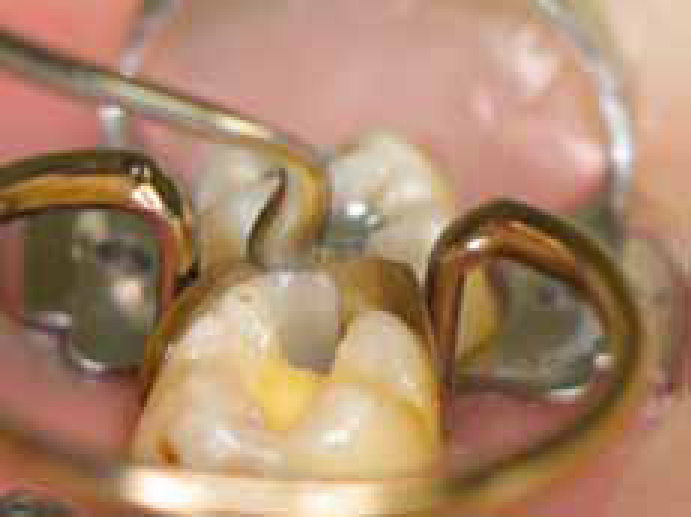
Following placement in the box, the occlusal component of the cavity is then filled. Remember, Class I cavities tend to have higher unfavourable ‘C’ factors, resulting in a higher incidence of post-operative sensitivity. Therefore, they should be filled in small increments (Figure 6). The same applies to Class V cavities.27,28
A. Yes, modern composite resin instruments have a non-stick surface, which makes the placement of the resin easier. If a composite continues to stick to the instrument, it may be appropriate to change the composite system itself.
A. Incremental filling is a technique where multiple small increments of composite are applied and then light cured between each increment. This technique is used to minimize the polymerization shrinkage of the composite that causes stress within the restoration (C-factor). Ideally, avoid placing increments attached to both buccal and lingual walls simultaneously, as this results in higher stress on the bonded surfaces and/or within the material.
Layering is the technique where a dentine shade of composite is applied to the deeper layers and a shade of enamel is placed on top. This technique can be used for anterior and posterior restorations.
Dentine shades are more opaque, while enamel shades tend to be more translucent. The surface enamel layer should be placed in thin sections for maximum aesthetics.29
A. Chemically cured and dual-cured resins contain amines, which will result in colour change over time.
For light-cured resin composites, the most likely cause of colour change is insufficient curing. Each increment should be cured for 30 seconds and cured again following finishing. The intensity of the curing light should be checked regularly with a radiometer to make sure it has adequate output (minimum intensity 600 mW/cm2). The halogen bulb should be replaced after 100 hours of use, annually, or whenever the light intensity is too low. The end of the light guide should be cleaned regularly.
Distance from the curing resin and the shade of composite are important factors in achieving the maximum cure of the system, and should be kept to a minimum. There is no risk in over-curing a composite.30
A. The halogen light is excellent and continues to be a good choice.
LED (Light-Emitting Diode) lights are now available and will eventually replace the halogen model. Most are cordless and they give an excellent level of light intensity at the desired wavelength with little heat production.
The depth of cure relates to the output intensity of the light, not to the emitting system. Generally, LED units have a narrow band width (around 470 nm) and therefore may not cure adequately some resin composites containing photo-initiators that react at different wavelengths. This problem may be encountered with some clear or bleached shades that do not contain camphoroquinone.
Plasma curing units are usually high intensity lights, which can cure a composite in a few seconds. However, this may have a deleterious effect on the bond to the tooth as a result of a high rate of shrinkage stress development.31,32,33,34
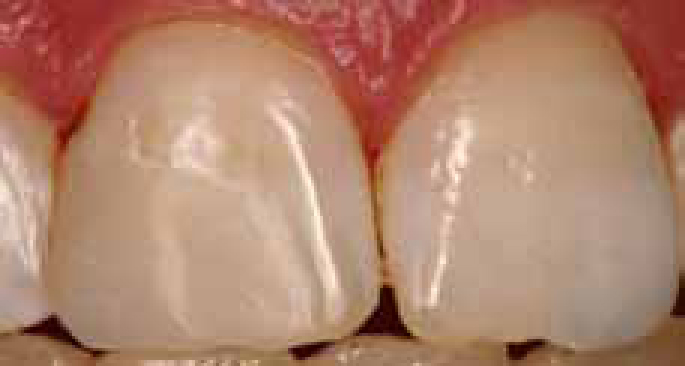
A. White lines may result from the dust of the composite that fills the existing microgaps over the edges of the restoration if the composite is not well adapted to the walls of the tooth (Figure 7). Alternatively, the white lines may result from cracking of the enamel surrounding the restoration. This may be caused by unsupported enamel or too much composite being cured at any one time. Good bonding technique, composite application and attention to the various stages of finishing the restoration will eliminate these lines. It is important to run the polishing system (disks, cups) from the restoration towards the tooth.
A. A layer of unfilled or slightly filled resin may help to fill voids on the surface, giving a shiny finish. However, it does not replace the finishing process and will be worn away very quickly, revealing any pre-existing surface defects. You can avoid a sticky composite resin surface (air inhibited layer) by placing a water soluble gel on the tooth and curing the final layer through the gel. The gel can then be rinsed away.
A. There is evidence that preheating a resin restorative material improves its ability to adapt to the cavity margins, with a resultant reduction in microleakage, and an increase in surface hardness.35,36
The basis of this article is to address questions frequently raised by dentists on continuing education courses. With the increased use of composite resin restoratives, it is imperative that manufacturers and the profession work closely together to achieve the highest clinical outcomes.
We have only addressed a limited number of questions and provided some answers and recommendations which may help dentists in their daily practice. The placement of composite restorations is more technique-sensitive than amalgam placement. However, excellent long-term restorations can be achieved when the operator understands the physical properties of the material.