Abstract
Management of Enamel-Dentine Fractures with Clear Crowns in a Young Patient
From Volume 47, Issue 2, February 2020 | Pages 172-173
Management of Enamel-Dentine Fractures with Clear Crowns in a Young Patient
Enamel dentine fractures are common forms of dental trauma in children (Figures 1 and 2). Restoration of the fracture is important for aesthetic reasons but also to ensure a good prognosis for pulp. Managing a young patient presenting as an emergency with an enamel dentine fracture can often be challenging due to pain and anxiety. Using clear crown forms is a technique which is quick, simple and an effective method for restoring these teeth. The technique is widely accepted by young patients and produces an aesthetic result (Figures 3 and 4).


It is essential to carry out a full trauma assessment prior to restoring the teeth, including sensibility testing, radiographs and clinical photographs.
A buccal infiltration with lidocaine is normally sufficient.
Isolate the affected teeth using a dri-dam or rubber dam. A split dam technique can be used as it is important to see the adjacent teeth when selecting your crown. Using a dri-dam or rubber dam ensures adequate moisture control, protects the patient’s soft tissue and provides airway protection. Dri-dams or rubber dams can be secured with clamps or wedges, the latter often being more readily acceptable for paediatric patients (Figure 5).

Bevel the margin of the fracture to improve retention and avoid a butt joint.
Clear crown form kits provide a range of tooth forms in a variety of sizes. A few sizes may need to be tried before deciding which crown form most closely fits the natural shape and form of the tooth you are restoring. Size selection can be aided by placing the incisal edge of the crown form against the adjacent tooth to choose the correct width (Figure 6).

Trim the crown form using scissors, cut the crown form so it resembles the shape of the lost fragment of tooth you are trying to restore. Curved Bee Bee scissors are ideal for this.
Check the margin of the crown form sits just beyond the fracture line to increase retention (Figure 7). In severe fractures or in a case with several failed restorations it is worth considering full coronal coverage with the composite margin at the gingival margin.
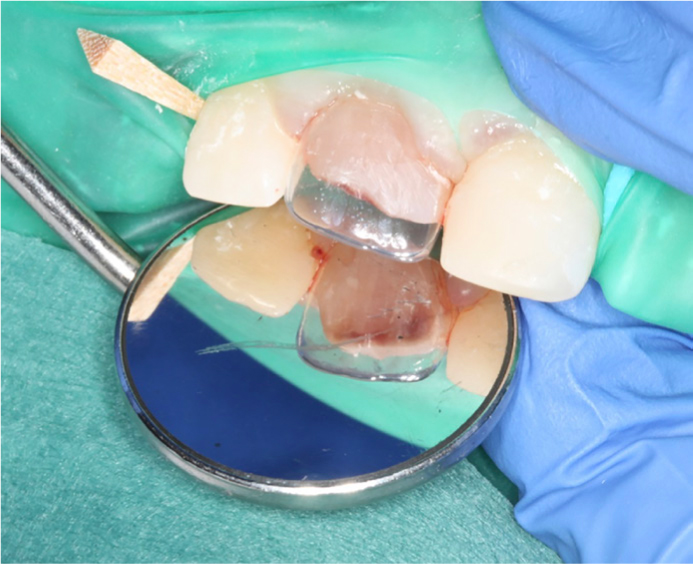
Small vents should be cut into the incisal edge to allow for excess composite removal as the crown is seated.
Prepare the tooth for a composite restoration using etch (usually 35% phosphoric acid) and a bonding agent.
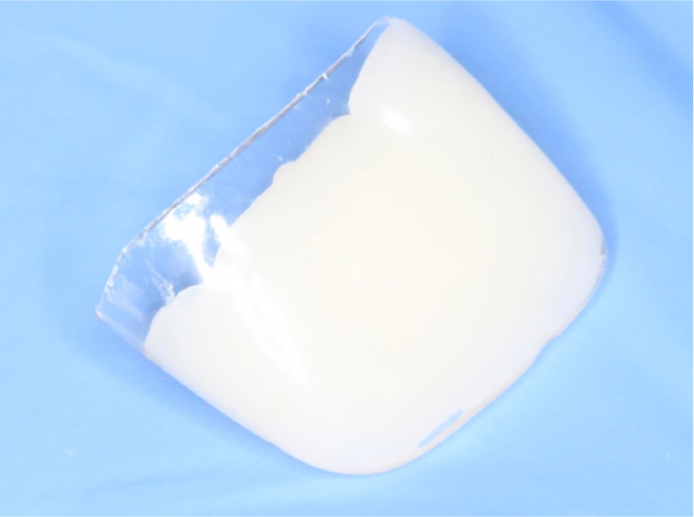
Fill the crown form with composite, taking care to ensure sufficient composite is placed in the crown (Figure 8). Position the crown form ensuring that it is orientated correctly and seat using light pressure to avoid air bubbles (Figures 9 and 10). It can be helpful to examine the crown form positioning from different views to ensure correct angulation and projection. Remove the excess composite material and light cure while the crown form is still in place. Carefully remove the crown form using an excavator or probe and assess the restoration (Figure 11).


Polish the composite restoration as normal ensuring smooth adaptations of the margins.